Hi Everyone
Just last weekend I was honoured to be one of the 4 Class presenters for our regional Stampin Up Event- Heartfelt Event. My topic to deliver was Handmade Gifts and because of my love for Fabric, Patterned Paper and Cardstock, I included all these in my presentation. I put a lot of thought and time into my projects leading up to the event and felt quiet nervous on the day this being only my second time to ever do presentations of this sort and longer than my last 5 minute time frame last year. I was also involved earlier in the year in Product playground at the South Pacific SU convention in Canberra. Time will tell how my presentation was liked and if there is ever to be such an opportunity again, I am my own worse critique, its like morning talks at school all over again LOL! Though I am up for the challenge. Most of all I love to share what I passionately enjoy making myself.
So I will share these over a few posts along with some vital measurements etc as promised. I also displayed the measurements on templates on the display boards on the day.
Designer Fabric in Floral District Butterflies
I have made these previously in paper only and they have proven quiet popular with other SU demonstrators contacting me to teach the project in classes with their own customers.
Butterfly Wreath
All Fabric was first adhered to cardstock using the Sizzix Multi-purpose Adhesive sheets, then run through the big shot using the Beautiful Butterflies Big Shot Die
and then the cut out butterfly shapes run through the big shot using various embossing folders- Spots, Stripes and Lacy Brocade. You need 7 medium sized butterflies, 7 of the smallest butterflies and 1 large butterfly for the centre, this one is cut on the fold.
The entire collection along with the Handband Holder.
To make the Hand band Holder you need a 3" piece of fabric with iron on interfacing on the wrong side of fabric for added stiffness, folded in half with right sides together, twist the seam to the centre and stitch across one end and then turn through forming a long tube, press and add ribbon forming loops, stitch across width ways at regular intervals. Finish off with a metal ring one end, some felt flowers cut from the Big Shot - Original Blossoms die, a ribbon bow and a couple of Designer Bright buttons. What you have is a great little pressie for the girls to keep their hair bands tidy. Makes a great craft fair item too.
Butterfly Fabric Magnets
Butterfly Hoop Wall-Hanging
I started with a square of white patchwork fabric about 2" larger than the size of my wooden hoop.
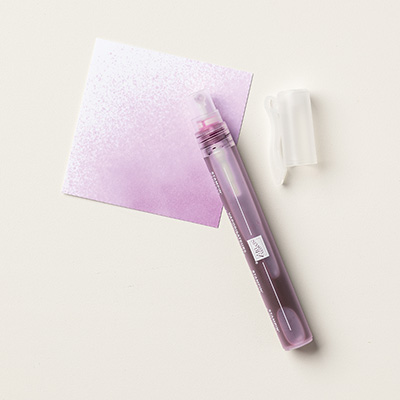
I cut out a butterfly shape from the Butterfly Big Shot die to use as a mask shape, then spritzed my fabric with a few drops of Daffodil Delight re inker in some water , sprayed that onto my fabric the new SU Spritzer bottles (shown below), covering one section of my fabric with the butterfly shape to leave a 'white' space to later add my stamped sentiment, making this a focal point of the project.
I also used my masked shaped again to cover the new white space and stamped some flourishes top and bottom with the Creative Element stamp set
I've then gone around the 'white' butterfly area with a simple back stitch to bring definition to the project. I used a Hexagon template (available at your local craft or Patchwork shop) and traced around them on the back of the Floral District Designer Fabric, that was previously covered with the Big Shot Adhesive. I cut the shapes out by hand with fabric scissors. This Adhesive sheet available from Stampin Up, is a thicker sort and great for projects where you want to directly adhere fabric to fabric. If you intended to wash your project several times in the future I'd recommend sewing around the raw edges first. In this instance I have no intention of washing this project so I've left my shapes with raw edges.
I've added a felt flower, cut from the Big Shot originals blossom die and designer button to give extra texture.
I then ironed my creative piece to a thin layer of iron on Pellon wadding to give it a quality look.
I secured it in the hoop and tighten, trimmed away the excess over hand to about 3/4" around the hoop edge and covered the back with a circle shape covered with fabric using the Multi-purpose sticky sheets, then glued that shape to the back on my wall hanging with the hot glue gun.
Fabric art works in Hoops are all the trend at the moment and very easy to do.
Well that is just the first segment of my presentation, will share more in next post.
I hope those who got to witness these in real life caught hold of the process and were inspired to try some themselves. If this is the case I'd love to hear how you went with them. I tried to keep in mind that not all enjoy a sewing process but would like the papercrafters to also give fabric a go and include stamping in their projects as well.
Hope your having a great week
Enjoy - Ruthy


Yes that is lovely I like the method you used I will try that!
ReplyDelete